




Your EPS moulding machine again throws a tantrum—steam misbehaves, beads clump, and every cycle feels like a guessing game. You’re not running production; you’re babysitting a very expensive, very moody popcorn maker.
Relax. By tuning steam pressure, checking vacuum integrity, and following tested maintenance standards, you can turn chaos into stable output. For detailed guidance, see this technical report from the British Plastics Federation: EPS Processing and Best Practices.
⚙️ Frequent Hydraulic System Failures and Practical Maintenance Methods
Hydraulic problems in EPS moulding machines often lead to unstable pressure, slow movement and oil leaks. These issues reduce product quality and increase unplanned downtime.
By setting clear inspection routines, using clean oil and monitoring key parts, you can prevent most failures and keep your EPS line running with stable output.
1. Unstable Hydraulic Pressure and Sudden Stops
Unstable pressure often comes from worn pumps, clogged filters or air in the oil. Check pressure gauges daily and record abnormal drops or spikes.
- Replace clogged filters on schedule
- Bleed air from the system after maintenance
- Keep pump suction lines fully sealed
2. Oil Leaks Around Valves and Cylinders
Oil leaks not only waste energy but also create safety risks. Most leaks come from hardened seals or loose fittings.
- Inspect seals during each weekly stop
- Tighten fittings using torque guidelines
- Use compatible seal materials for oil type
3. Overheating of Hydraulic Oil
High oil temperature reduces lubrication and shortens component life. Poor cooling and dirty heat exchangers are the main reasons.
| Cause | Check Point | Action |
|---|---|---|
| Dirty cooler | Cooling fins, water lines | Clean fins, flush lines |
| Low oil level | Tank indicator | Refill with correct grade |
4. Slow Cylinder Movement and Low Efficiency
Sluggish cylinder motion reduces cycle speed and affects foam forming. Worn seals, wrong valve settings and low pump output are typical reasons.
- Check cylinder internal leakage with simple stroke tests
- Adjust flow control valves gradually
- Keep spare seals for critical cylinders
🔥 Inadequate Steam Heating, Uneven Foaming and Adjustment Techniques
Uneven steam heating causes poor EPS fusion, rough surfaces and weak corners. Heat control must match the mould size, bead density and cycle time.
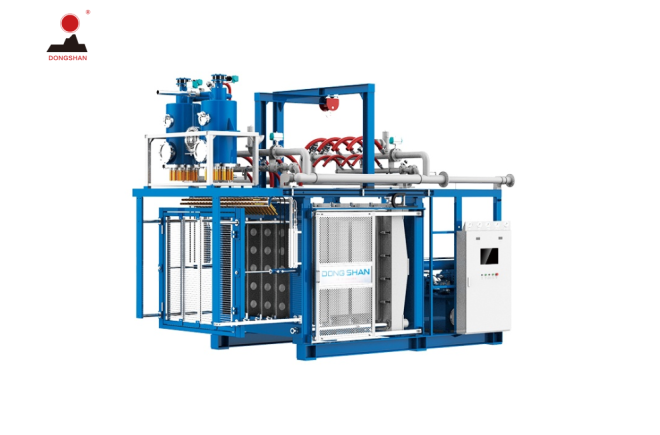
Smart steam control on modern lines such as the EPS fully automatic X-B type shape molding machine helps keep stable temperature and saves energy.
1. Diagnosing Uneven Steam Distribution
Check pressure at the inlet and compare cavity temperature at several points. Large gaps show poor steam balance or blocked pipes.
| Position | Ideal Temp (°C) | Common Issue |
|---|---|---|
| Center | 100–105 | Slow reach to setpoint |
| Corners | 98–103 | Local cold spots |
2. Adjusting Steam Pressure and Time
Too high pressure burns beads, while low pressure gives weak fusion. Adjust in small steps and track results for each product type.
- Change steam time by 1–2 seconds per trial
- Record optimal settings for repeat orders
3. ECharts-Based Defect Rate Comparison
The chart below shows how defect rates drop after proper steam tuning and maintenance on EPS moulding machines.
4. Matching Pre-expander Settings with Moulding
If bead density is not stable, steam settings will fail. Align pre-expander density, ageing time and filling method with moulding parameters.
- Keep density variation within ±3%
- Use ageing silos with even air flow
🧊 Cooling System Inefficiency Causing Deformation and How to Optimize
Poor cooling leads to shrinkage, warping and longer cycles. Stable cold water supply and clean vacuum lines are key to precise EPS parts.
1. Checking Water Flow and Temperature
Measure inlet and outlet temperature differences. A small difference can mean low flow or blocked channels in the mould.
- Keep inlet water near 12–18°C
- Descale lines every few months
2. Improving Vacuum Cooling Performance
Weak vacuum gives soft blocks and slow demoulding. Inspect vacuum pumps, traps and seals on doors and pipes.
- Drain water traps daily
- Replace worn vacuum seals quickly
3. Using Advanced Machines for Better Cooling Control
Modern systems such as the New type Quick mold changing machine combine faster mould change with improved cooling circuits to cut downtime and reduce warpage.
📏 Inaccurate Mould Size, Poor Product Precision and Calibration Solutions
Size errors often come from thermal growth, worn parts and incorrect parameter settings. Regular calibration ensures stable EPS product dimensions.
1. Verifying Mould and Machine Alignment
Misalignment between fixed and moving platen causes flash and size drift. Use feeler gauges and dial indicators to check flatness and parallelism.
- Record alignment values after each major repair
- Adjust tie-bar nuts as needed
2. Compensating for Thermal Expansion
Steel moulds grow as temperature rises. Plan clearance and clamping force based on real running temperature, not room temperature.
| Factor | Impact | Action |
|---|---|---|
| Mould temp too high | Oversize parts | Increase cooling, reduce steam |
| Mould temp too low | Undersize, poor fusion | Raise steam time |
3. Using Precision EPS Equipment
Machines like the EPS Fully Automatic X-A Type Shape Molding Machine for Packaging and Insulation provide accurate clamping control, which helps maintain tight dimensional tolerance on demanding parts.
🧽 Blocked Material Lines, Dust Accumulation and Daily Cleaning Guidelines
Blocked lines and dust cause feeding problems, density variation and surface defects. Simple daily cleaning keeps production smooth and reduces scrap.
1. Routine Cleaning of Material Lines
Dust and broken beads settle in corners and cause plugging. Plan quick cleaning at the end of each shift.
- Blow lines with dry compressed air
- Check and clean strainers and screens
2. Managing Workshop Dust and Bead Spillage
Loose beads on the floor and machines can enter valves and sensors. Control them with basic housekeeping rules.
| Task | Frequency |
|---|---|
| Floor sweeping | Each shift |
| Machine surface wipe | Daily |
| Deep cleaning | Monthly |
3. Lubrication without Causing Contamination
Too much oil on open parts attracts dust. Apply only the needed amount and wipe excess oil from exposed moving parts.
Conclusion
By focusing on hydraulic health, steam balance, cooling efficiency, calibration and cleaning, you can cut EPS moulding defects and downtime. Combine clear checklists with trained operators and regular data review.
Stable production, lower energy use and longer machine life will follow, helping your factory deliver consistent EPS packaging and insulation products.
Frequently Asked Questions about eps moulding machine
1. How often should I change hydraulic oil in an EPS moulding machine?
Most plants change hydraulic oil every 6–12 months, depending on running hours and test results. Always test oil for contamination and viscosity before deciding.
2. Why do my EPS parts shrink after demoulding?
Shrinkage usually comes from high mould temperature, short cooling time or low vacuum. Check cooling water temperature, vacuum level and steam settings together.
3. What is the best way to reduce steam consumption?
Use proper insulation on pipes, fix leaks, and tune steam pressure and time for each product. Good pre-expansion control also helps reduce steam use.
4. How can I improve dimensional accuracy on complex EPS parts?
Ensure stable bead density, precise mould temperature, correct clamping force and regular alignment checks. Advanced EPS machines with accurate control loops further improve precision.
5. How frequently should I clean material lines and filters?
Light cleaning should happen daily, with line blowing and filter checks at least weekly. In dusty environments, increase the cleaning frequency to avoid sudden blockages.

 Privacy settings