





Still wrestling with stubborn Thermocol moulds like they’re glued in place, watching deadlines melt faster than hot EPS beads, and wondering if “quick changeover” is just a factory myth?
This guide shows clear mould design, smart setup, and faster changeovers, backed by OECD manufacturing efficiency research.
🔧 Key components of thermocol shape moulding machines and their functions
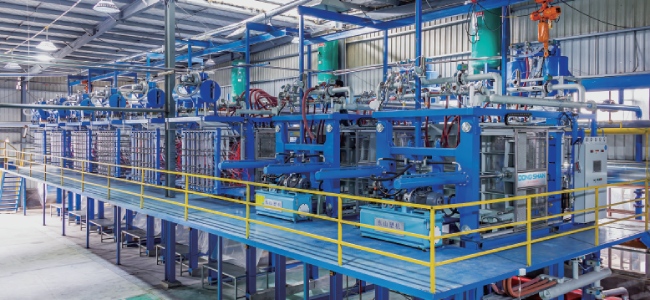
Thermocol shape moulding machines use steam, vacuum and compressed air to expand, form and cool EPS beads into accurate shapes for packaging and insulation.
Each core component needs balanced control to keep density, surface finish and dimensional accuracy stable, even during frequent mould design changes and quick changeovers.
1. Steam chamber and heating system
The steam chamber softens EPS beads so they fuse smoothly inside the mould cavity.
- Uniform steam flow prevents warping and shrink marks.
- Correct pressure shortens cycle time while saving energy.
- Stable temperature improves wall strength and bonding.
2. Vacuum system and cooling circuit
The vacuum system pulls out moisture and air, then speeds up cooling to lock in shape and strength.
| Factor | Effect on product |
|---|---|
| Vacuum level | Reduces voids and blowholes |
| Cooling time | Controls shrinkage and flatness |
| Water flow | Protects mould from heat stress |
3. Mould clamping and ejector system
The clamping system must close the mould with strong, even force and then release parts safely after cooling.
- Balanced clamping avoids flash and misalignment.
- Guided ejectors reduce breakage of sharp corners.
- Quick‑lock platens speed up mould changeover.
4. PLC control, sensors and safety devices
The PLC links temperature, pressure, cycle time and safety feedback into one clear, easy‑to‑use interface for operators.
- Recipe storage for different mould designs.
- Alarms for low steam, air or vacuum.
- Door locks and emergency stops for safe running.
📐 Principles of efficient thermocol mould design for strength and accuracy
Good EPS mould design balances part strength, weight and material cost. It controls filling, fusion and cooling to reduce defects and scrap.
Designers must consider bead grade, vent layout, water channels and demoulding angles to keep cycle time short and dimension tolerance tight.
1. Wall thickness and rib layout
Use even wall thickness and strong ribs to avoid sink marks and weak zones.
- Keep most walls within a narrow thickness range.
- Add ribs instead of thicker walls for stiffness.
- Round transitions reduce stress and cracking.
2. Venting, filling and gate position
Correct vent and gate placement lets beads fill all areas and fuse evenly without burns or voids.
| Design item | Best practice |
|---|---|
| Vents | Place at far ends and thick zones |
| Gates | Feed from thicker to thinner areas |
| Overflow | Use small overflow pockets to capture scrap |
3. Draft angles and ejector layout
Enough draft and smooth surfaces help parts release cleanly, which is key for fast cycles and less breakage.
- Use at least 1–2° draft on deep walls.
- Avoid undercuts unless needed for function.
- Align ejectors with strong ribs, not thin walls.
4. Cooling channel design and cycle time analysis
Balanced water channels reduce hot spots, warping and long cycles. Simple data tracking helps tune design for speed.
⏱️ Step‑by‑step mould changeover procedure to minimize machine downtime
Standardized changeover steps reduce errors, protect moulds and keep thermocol production lines running with stable quality and cost.
Train operators to follow the same checklist every time, and support them with quick‑lock hardware and clear PLC recipes.
1. Pre‑shutdown preparation and safety
Prepare tools, next mould and safety checks before stopping the current run.
- Back up current PLC parameters and recipes.
- Isolate steam, air and power; lockout where needed.
- Let the mould cool to a safe handling temperature.
2. Mould removal and interface checks
Remove the old mould gently, then clean and inspect contact faces and connections.
| Item | Check |
|---|---|
| Platens | Flat, clean, free of rust |
| Pipes | No leaks or loose fittings |
| Sensors | Secure, no damaged cables |
3. New mould installation, testing and ramp‑up
Install, align and test the new mould with short trial cycles before full production.
- Use quick‑change clamps where possible.
- Run a few low‑pressure test shots and adjust.
- Record final settings as the standard recipe.
🧪 Maintenance and cleaning practices to extend mould service life
Clean, well‑lubricated moulds hold tolerance longer, cut unplanned downtime and reduce scrap from dents, rust and blocked vents.
Use a simple maintenance schedule and record each activity to track mould condition over time.
1. Daily cleaning and visual inspection
Light daily cleaning keeps deposits, dust and beads from building up around vents and parting lines.
- Blow off loose beads with dry air.
- Wipe parting faces with soft, lint‑free cloth.
- Check for cracks, dents or loose hardware.
2. Weekly vent, cooling and lubrication care
Deeper weekly work targets vents, water circuits and moving parts.
| Task | Purpose |
|---|---|
| Vent cleaning | Prevents burning and short shots |
| Flush cooling lines | Maintains fast, even cooling |
| Lubricate guides | Reduces wear and misalignment |
3. Periodic overhaul and storage protection
Scheduled overhauls restore worn moulds, while correct storage prevents rust and damage between runs.
- Measure key dimensions and re‑polish surfaces.
- Replace seals, springs and worn fittings.
- Apply rust inhibitor and store in dry racks.
🏭 Why Dongshan Plastic Machinery mould systems improve productivity and mould changeover speed
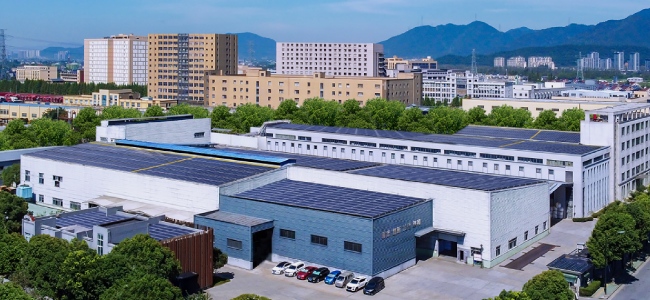
Dongshan Plastic Machinery integrates fast mould change, stable vacuum and smart control to cut cycle time and raise EPS product quality.
These systems support flexible production for different packaging, insulation panels and custom thermocol parts.
1. High‑performance EPS shape moulding platforms
The EPS Fully Automatic X-A Type Shape Molding Machine for Packaging and Insulation offers precise steam and vacuum control for complex mould designs.
- Fully automatic cycles with recipe control.
- Reliable clamping and fast ejection.
- Ideal for high‑volume, stable EPS production.
2. Quick mould changing technology
The New type Quick mold changing machine reduces changeover time with standardized interfaces and rapid clamping.
| Benefit | Result |
|---|---|
| Shorter stops | More productive hours per shift |
| Less manual work | Higher safety and repeatability |
| Easy alignment | Stable part accuracy after change |
3. Central vacuum integration for stable quality
The High-Efficiency Central Vacuum System for EPS Production supports multiple machines with constant vacuum and low maintenance.
- Improves fusion and surface finish across all moulds.
- Reduces energy waste and local pump upkeep.
- Stabilizes cycles for accurate process data.
Conclusion
Thermocol shape moulding performance depends on smart mould design, strong machine components and disciplined changeover routines. Plants that follow these practices gain higher output, better quality and longer mould life.
With quick‑change systems, efficient vacuum and automatic control, you can switch moulds faster, keep density stable and serve more customer needs on one EPS line.
Frequently Asked Questions about thermocol shape moulding machine
1. What is a thermocol shape moulding machine?
It is a steam‑powered EPS forming machine that expands, shapes and cools polystyrene beads inside a mould to make custom packaging or insulation parts.
2. How often should I change moulds?
Frequency depends on order size and product mix. With a good quick‑change system, many plants switch moulds several times per day without losing much production time.
3. Why is vacuum so important in EPS moulding?
Vacuum removes air and moisture from the mould. This helps beads fuse fully, speeds cooling, reduces voids and improves surface quality and strength.
4. How can I reduce EPS moulding cycle time?
Optimize steam and vacuum levels, improve cooling channel layout, maintain clean vents and use standard mould interfaces for faster changeover and setup.
5. What causes poor surface finish on thermocol parts?
Common causes include blocked vents, low steam pressure, uneven bead density, worn mould surfaces or unstable vacuum. Regular cleaning and tuning usually fixes these issues.

 Privacy settings